Pro-Quality DTF Setup: Essential Supplies and Tips Guide
Launching a Pro-Quality DTF Setup is a strategic move for anyone serious about direct-to-film printing. With the right DTF supplies, you can streamline production, reduce waste, and deliver durable, vibrant transfers. This guide highlights the essential components, a practical Direct-to-film workflow, and proven DTF heat press settings that lead to consistent results. By focusing on DTF ink and film compatibility and a clean, organized workspace, you’ll speed up production while maintaining color accuracy. Whether you’re selling custom garments or partnering with brands, a pro-grade setup supports scalable, repeatable results.
Think of a professional-grade DTF configuration as a cohesive system where clean workflows, dependable machines, and consistent color are the baseline. In practice, leveraging DTF printing tips and careful selection of DTF supplies helps translate designs into repeatable, scalable results. An optimized Direct-to-film workflow emphasizes a logical design-to-transfer sequence, aligned with reliable DTF heat press settings and proper curing. Additionally, consider DTF ink and film compatibility to ensure consistent adhesion, vibrant color, and durable transfers across fabrics.
Frequently Asked Questions
What are the essential DTF supplies for a Pro-Quality DTF Setup and how does ink and film compatibility affect results?
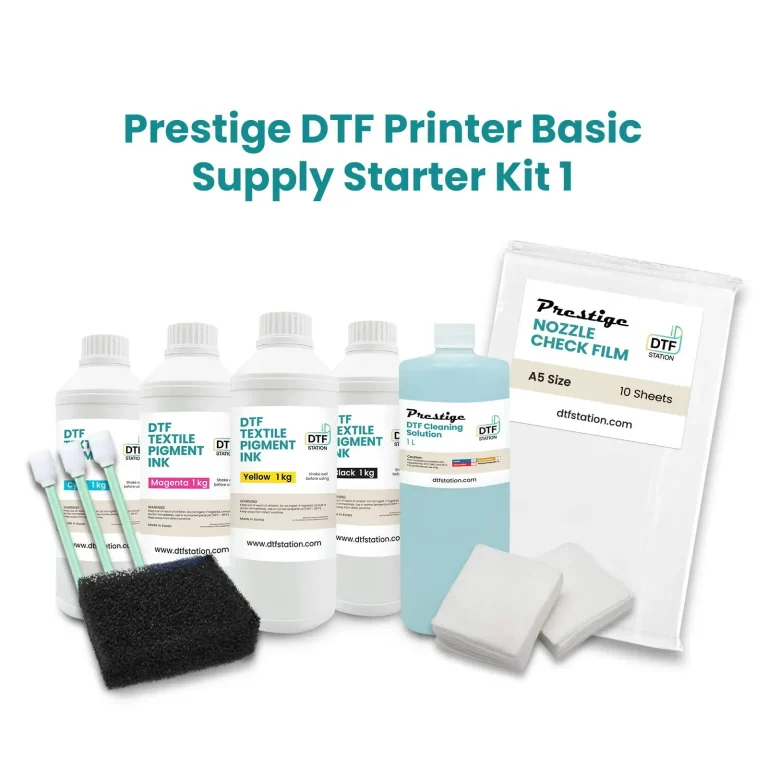
A Pro-Quality DTF Setup relies on a core bundle of supplies: a DTF printer compatible with water-based pigment inks, high-quality DTF film, a reliable coating powder, adhesive and a solid curing method, and a suitable heat press. Include white underbase when needed, protective sheets, PPE, lint-free cleaning supplies, and a small assortment of test substrates to fine-tune results. Ink and film compatibility are critical: choose pigment inks that match your film’s coating and thickness, calibrate the powder amount for a smooth bed, and verify adhesive compatibility across light and dark fabrics. Regular testing on common fabrics helps prevent color shifts or adhesion issues and keeps profiles repeatable. Maintain logs of profiles, powders, films, and pressing parameters to scale production with confidence.
How can I optimize the Direct-to-Film workflow and DTF heat press settings within a Pro-Quality DTF Setup to achieve consistent results?
Follow a clear Direct-to-Film workflow to keep results consistent in a Pro-Quality DTF Setup: start with design and color management using proper profiles, print with calibrated printer settings, powder while the film is tacky, cure to set the powder, press at a baseline you adjust per fabric, then cool and peel followed by finishing checks. For DTF heat press settings, use a starting range of 150–170°C, 12–20 seconds, and moderate to firm pressure, adjusting for fabric type and powder; include a brief pre-press to flatten the fabric and a light post-press cooldown. Document exact settings for each fabric type (cotton, blends, darks) and ensure the press temperature matches the readout for accuracy. Regular maintenance and testing, along with keeping a log of successful profiles, will help you scale production with consistent quality in your Pro-Quality DTF Setup.
| Aspect | Key Points |
|---|---|
| Introduction | Launching a Pro-Quality DTF Setup is a strategic move for reliable, high-quality direct-to-film printing, with a plan for a well-equipped workspace and proven tips. |
| Essential components | Core elements include a DTF-capable printer, compatible film, coating powder, curing method, and a dependable heat press to enable a professional workflow. |
| DTF supplies | Printer and DTF inks, DTF film, transfer powder, adhesive and curing options, white underbase (if needed), heat press, protective sheets, substrates for testing, cleaning supplies, PPE. |
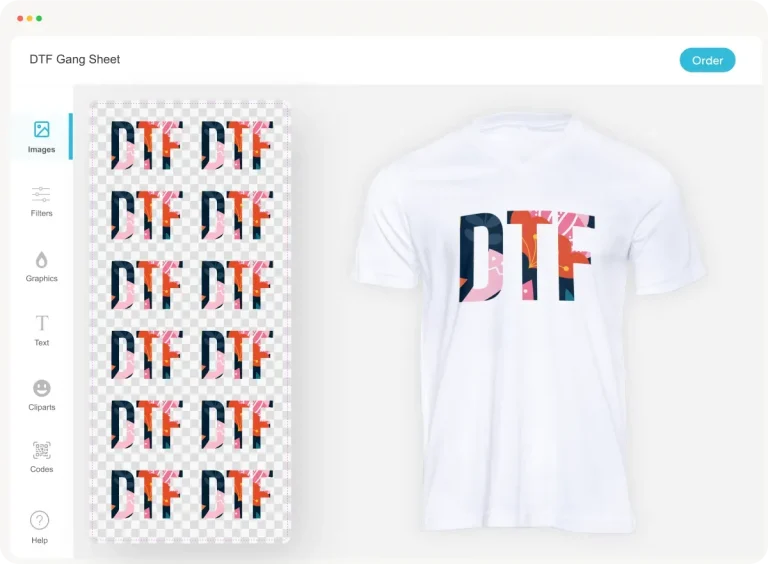
| Direct-to-film workflow | A well-structured workflow from design to press reduces errors and accelerates production: design and color management, printing, powdering, curing, pressing, peeling, finishing checks. |
| DTF heat press settings | Establish a baseline: temperature 150–170°C (302–338°F), time 12–20 seconds, moderate to firm pressure; include pre-press and post-press steps; document profiles for fabrics. |
| DTF ink and film compatibility | Use pigment-based inks for color and durability; ensure suitable film thickness; calibrate powder; verify adhesive compatibility; test across fabrics to ensure color and adhesion. |
| Maintenance, troubleshooting, and workflow optimization | Regular cleaning, humidity control, alignment checks, ventilation, spare parts, and documenting successful profiles to improve reliability and speed. |
| Space, ergonomics, and workflow design | Plan a clean, organized space to minimize movement and cross-contamination; dedicate zones for printing, powdering, and pressing; invest in stable surfaces and good lighting. |
| Common mistakes to avoid | Overloading powder, under-curing, inconsistent press settings, skipping testing, and neglecting maintenance. |
| From concept to production | Create a phased plan with defined fabrics/volumes, dedicated SOPs, pilot batches, and gradual scaling using proven profiles. |
Summary
Pro-Quality DTF Setup is a disciplined, repeatable approach to production. By selecting reliable supplies, optimizing the direct-to-film workflow, and tuning heat-press settings for different fabrics, you’ll achieve durable, vibrant transfers across textiles. Maintain a clean, organized space, document successful profiles, and continuously test with new designs and fabrics. With steady practice and proactive upkeep, your Pro-Quality DTF Setup becomes a scalable engine for your printing business, delivering consistent results and happy customers with every transfer.