DTF Transfers: A Step-by-Step Tutorial for Stunning Designs
If you’re looking to elevate your custom printing game, DTF transfers are an exciting option to consider. Known for producing vibrant and long-lasting designs on various fabrics, the DTF printing process is quickly gaining traction among enthusiasts and professionals alike. In this ultimate guide, we’ll explore how to create DTF transfers easily, taking you through essential steps while sharing valuable tips. Whether you’re a novice seeking a DTF printing tutorial or a seasoned pro hunting for the best DTF printer, this comprehensive resource has got you covered. Get ready to transform your fabric creations with stunning DTF transfer designs that truly stand out!
When discussing fabric printing techniques, Direct to Film (DTF) transfers is becoming a favored choice among crafters and entrepreneurs. This innovative method allows for an enhanced printing experience, resulting in eye-catching designs on textiles. By understanding the fundamentals of the DTF printing method, including how to effectively utilize DTF transfer paper and the right equipment, such as a DTF printer, you can delve into the world of custom apparel creation. Join us as we navigate through a detailed process on how to create DTF transfers that meet your style and quality expectations. With our step-by-step guide, you’ll soon master the artistry of DTF printing and leave your mark in the fabric design marketplace.
Understanding the DTF Printing Process
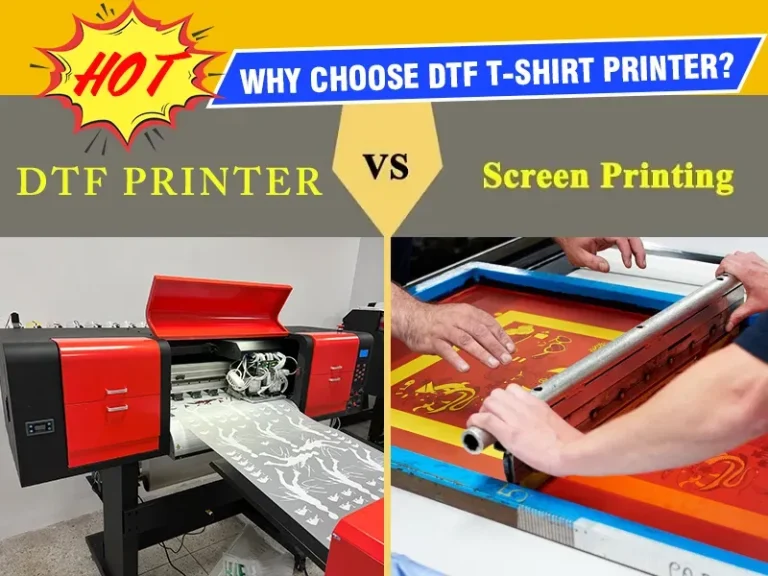
The DTF printing process begins with the digital creation of your desired design. Unlike other printing methods, DTF printing involves printing directly onto special PET film. This film is coated, allowing the vibrant inks to adhere effectively, ensuring that the colors pop once transferred onto the fabric. By mastering the DTF printing process, you can create intricate designs that are not only visually appealing but also durable, making them ideal for custom apparel.
Furthermore, the DTF printing process distinguishes itself with its versatility. You can print on a variety of fabrics, including cotton, polyester, and blends, making it suitable for numerous applications – from t-shirts to tote bags. The ability to print in vibrant colors on different materials opens up a world of creative possibilities, allowing designers and hobbyists alike to explore new design dimensions.
Essential Materials for DTF Transfers
To get started with creating DTF transfers, you will need several essential materials. The most crucial component is a **DTF printer** that is specifically designed to work with DTF inks. This type of printer ensures that your designs come out with accurate color reproduction and detail. Additionally, high-quality **DTF transfer paper** is vital; this PET film provides a smooth surface for printing and is engineered to withstand the transfer process without damage.
Other necessary materials include adhesive powder and a heat press. The adhesive powder plays a critical role as it bonds the ink to the fabric during the heat application. Selecting the **best DTF printer** is also important, as it can significantly influence the print quality and efficiency of your transfers. Surveys and reviews of various printer models will help you make an informed choice on the equipment that fits your printing needs.
Step-by-Step Guide to Create DTF Transfers
Creating DTF transfers can be simplified into a series of straightforward steps. Starting with designing your graphic, it is important to utilize software like Adobe Illustrator. Once you’ve perfected your design, load the PET film into your **DTF printer** to print the design directly onto the film. This method is highly effective in achieving the sharp clarity and bright colors that DTF transfers are known for.
After printing, it’s time to apply the adhesive powder while the ink is still wet. This step is crucial for ensuring the longevity and quality of the transfer. Once the powder is applied, the film needs to go through curing, where heat and pressure solidify the adhesive, making it ready for the final application on fabric. This meticulous approach guarantees that your transfers will adhere effectively and stand the test of time.
Tips for a Successful DTF Transfer
To ensure you achieve stunning DTF transfers every time, consider implementing some best practices. Always run test prints on scrap fabric to fine-tune your printer and heat press settings. This practice will help eliminate any issues prior to producing larger runs, which can save both time and materials. Understanding the difference between fabrics can also guide you in adjusting heat and pressure settings appropriately.
Additionally, quality materials significantly impact the finished product. Investing in high-grade inks and **DTF transfer paper** can lead to better color saturation and durability. Keeping up with new advancements and techniques in DTF printing through tutorials can also help you stay ahead in the crafting game, allowing you to continually refine your skills and improve your results.
Safety Precautions When Working with DTF Printing
Safety is paramount when working with any heat-related process, and DTF printing is no exception. Always take care to avoid direct contact with the heated surfaces of your heat press to prevent burns. It is recommended to use heat-resistant gloves and to handle materials with caution when they have been recently heated.
Ensuring that you work in a well-ventilated area is also essential, especially since handling inks and adhesive powders can produce fumes that may be harmful when inhaled. Utilizing a fan or opening windows can help maintain a safe working environment. By following these precautions, you can enjoy your DTF printing projects while minimizing risks.
Advancing Your DTF Transfer Skills
Once you become comfortable with creating DTF transfers, consider advancing your skills by experimenting with different fabrics and designs. Learning about the distinct characteristics of various materials will allow you to expand the range of products you can offer. Additionally, you might explore advanced printing techniques such as multi-layer transfers, which can add depth and complexity to your designs.
Engaging with online communities, forums, and social media groups dedicated to DTF printing provides valuable insights and inspiration. Sharing your work and gaining feedback from fellow enthusiasts can motivate you to try new approaches and improve your craft. Continuous learning and experimentation are key to mastering the art of DTF transfers!
Frequently Asked Questions
What is the DTF printing process and how does it work?
The DTF printing process involves printing designs onto a special PET film using a DTF printer, applying adhesive powder while the ink is wet, curing the adhesive with heat, and then transferring the design onto fabric using a heat press. This method allows for vibrant and durable prints on various materials.
How do I create DTF transfers effectively?
To create DTF transfers effectively, start by designing your graphic in software such as Adobe Illustrator. Print the design on PET film using a DTF printer, sprinkle adhesive powder on the wet ink, cure it with heat, and transfer the design onto your fabric using a heat press for the best results.
What materials do I need for DTF transfers?
To create DTF transfers, you need a DTF printer for printing, PET film for transferring your designs, adhesive powder for bonding the ink, DTF inks compatible with your printer, and a heat press machine to transfer the designs onto your chosen fabric.
What is the best DTF printer for creating transfers?
The best DTF printer for creating transfers typically includes features tailored for DTF inks, such as high-resolution printing capabilities, compatibility with PET films, and reliable feeding for continuous print jobs. Researching user reviews and specific DTF models can help identify the right one for your needs.
Can you provide a DTF printing tutorial for beginners?
Sure! A DTF printing tutorial for beginners involves designing your graphic, printing on PET film with a DTF printer, applying adhesive powder, curing the adhesive, and finally pressing the design onto fabric. Following these steps ensures successful DTF transfers.
What type of DTF transfer paper should I use?
DTF transfer paper is typically a specialized PET film designed for compatibility with DTF inks. It’s essential to choose high-quality transfer paper that suits your DTF printer and provides strong adhesion and vibrant color reproduction for the best results.
| Key Point | Details |
|---|---|
| Introduction to DTF Transfers | Direct to Film (DTF) transfers are popular for their versatility and vibrant designs. |
| Materials Needed | DTF Printer, PET Film, Adhesive Powder, Heat Press, DTF Inks are essential for creating transfers. |
| Step-by-Step Process | 1. Design Creation 2. Printing on DTF Film 3. Applying Adhesive Powder 4. Curing the Adhesive 5. Transfer to Fabric 6. Peeling the Film. |
| Tips for Success | Run test prints, ensure material compatibility, and use high-quality inks and films. |
| Safety Precautions | Avoid burns; work in a ventilated area when handling inks and powders. |
| Conclusion Summary | With practice, DTF Transfers can enhance your custom printing skills and lead to a profitable venture. |
Summary
DTF Transfers are a revolutionary method in custom printing, allowing individuals and businesses to create vibrant and durable designs on fabrics. By understanding the DTF printing process and following a clear step-by-step tutorial, anyone can master the creation of stunning transfers with relative ease. This method not only enhances the quality of custom apparel but also provides opportunities for profitability in a competitive market. As you dive into the world of DTF Transfers, remember that experimentation and quality materials will lead to the best outcomes, making your prints truly stand out.