DTF Gangsheet Builder: Step-by-Step Guide for Beginners
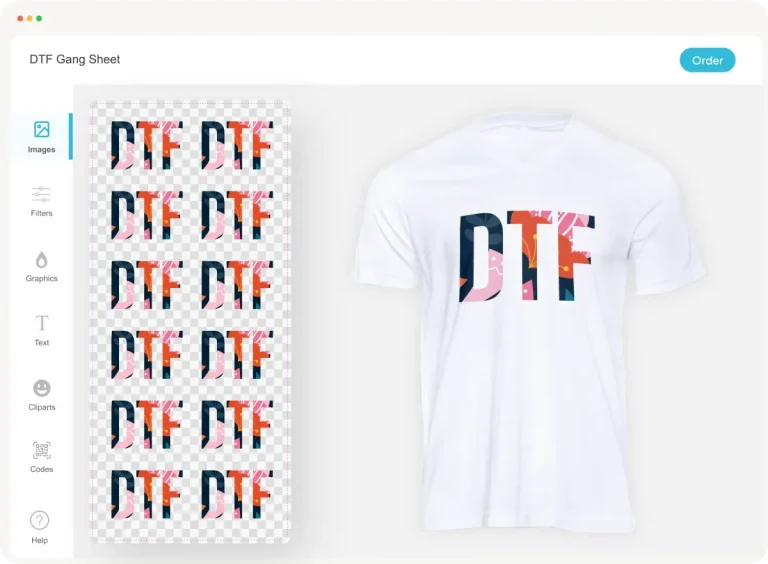
DTF Gangsheet Builder is transforming how beginners approach Direct-to-Fabric printing, turning crowded designs into efficient, space-saving layouts. This powerful tool helps you arrange multiple designs on a single transfer sheet, and the DTF gang sheet builder tutorial demonstrates how to optimize space and cut waste. By consolidating designs, it supports a clear DTF printing workflow that saves ink, material, and time across batches. For newcomers, learning how to create DTF gang sheets becomes easier when you follow a structured approach that keeps colors consistent. From templates to color management, this introductory guide explains essential steps and practical tips to scale DTF transfer sheet design and DTF gang sheets to real-world orders.
In other terms, the same concept acts as a layout optimization tool for multi-design fabric transfers, organizing artwork into efficient templates. Seen as a batch printing workflow, it reduces setup time and waste by enforcing a grid-based placement and consistent margins. When you apply this approach to DTF transfer sheet design, color profiles and safe zones become second nature, even as order complexity grows. By embracing these related terms and concepts, you create a foundation for scalable production that remains accurate and efficient under real-world workloads.
DTF Gangsheet Builder: A Beginner’s Path to an Efficient DTF Printing Workflow
The DTF Gangsheet Builder represents a practical toolset for arranging multiple designs on a single DTF transfer sheet, dramatically increasing efficiency in the DTF printing workflow. By grouping several designs together, you reduce setup time, save ink and materials, and improve consistency across garments. For beginners, adopting this approach helps you learn layout fundamentals, color management, and print accuracy in a way that scales to larger runs, all while keeping waste to a minimum.
Getting started with a gangsheet involves defining the target sheet size, setting a grid, and establishing margins that prevent edge cropping. A well-planned DTF transfer sheet design uses consistent spacing and alignment so every design prints crisply and lands where intended on fabric. As you gain comfort, you can expand from simple 2×2 grids to more complex layouts, leveraging templates and color profiles to maintain fidelity across multiple designs.
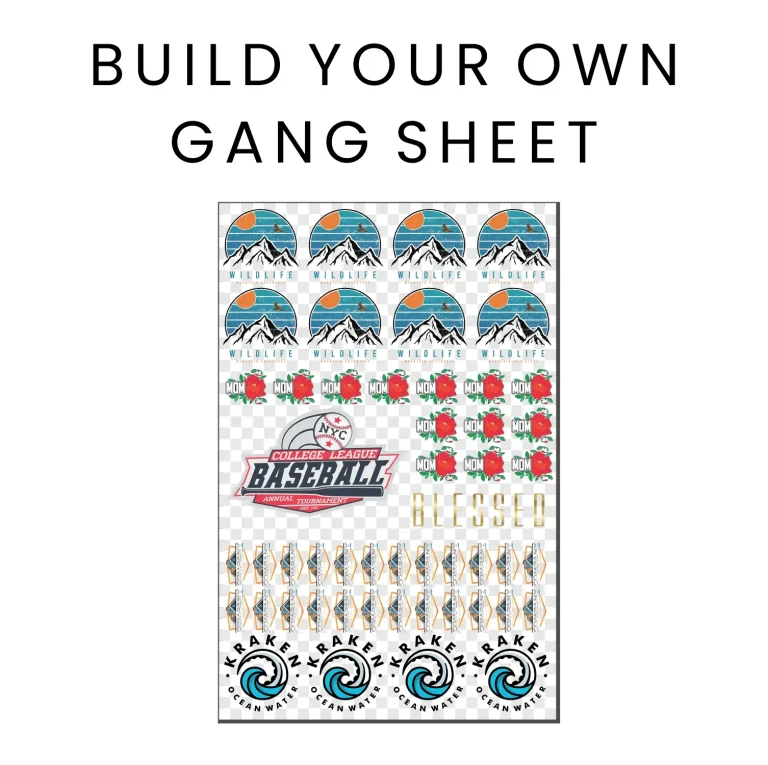
How to Create DTF Gang Sheets: A Simple DTF Gang Sheet Builder Tutorial
This subheading walks you through the practical steps of how to create DTF gang sheets, aligning with the idea of a DTF gang sheet builder tutorial. Start by gathering all artwork, choosing a suitable template or grid, and planning the layout to maximize printable area. You’ll learn to convert colors to the appropriate printer space, ensure proper resolution, and prepare a single file that can be exported for batch printing—an essential skill in the DTF printing workflow.
Next, arrange each design within its designated cell, maintain balanced spacing, and add necessary marks for trimming or registration. When you export print-ready files, aim for formats your printer accepts (PDFs, TIFFs, or high-resolution PNGs at 300–600 dpi) and test on fabric or release paper. Regular calibration, test prints, and documentation help you refine the process and ensure that the final DTF transfer sheet design matches expectations across different runs.
Frequently Asked Questions
What is a DTF Gangsheet Builder and how does it fit into the DTF printing workflow for DTF gang sheets?
A DTF Gangsheet Builder is a workflow and set of tools that lets you place multiple designs on one DTF transfer sheet. This approach streamlines the DTF printing workflow by using a grid, defined margins, and color management to save time, ink, and materials while keeping designs aligned on fabric. For beginners, it reduces setup steps and waste and helps you scale to larger gang sheets. Core steps include defining the target sheet size, creating a master template with margins and bleed, importing and arranging designs in the grid, exporting a print-ready file, and performing a test print to calibrate results.
How to create DTF gang sheets using the DTF gang sheet builder tutorial and apply effective DTF transfer sheet design?
To create DTF gang sheets, follow a DTF gang sheet builder tutorial workflow. Start by gathering all designs and selecting a target sheet size and grid. Create a master template with margins and a 2–3 mm bleed, then place each design in its cell and scale as needed. Manage colors for CMYK accuracy, export a print-ready file (PDF or TIFF/PNG), and run a test print on fabric to check alignment and density. Adjust margins, scaling, or color based on results before full production. This approach embodies good DTF transfer sheet design practices and helps deliver consistent results.
| Aspect | Key Points |
|---|---|
| What is a DTF Gangsheet Builder? | A workflow/toolset that arranges multiple designs on one DTF transfer sheet. Saves time, ink, and materials; reduces setup time; good for small batches and customization; beginner-friendly. |
| Why beginners should use a gangsheet approach | Provides a gentle on-ramp into professional production by teaching layout fundamentals, color management, and print accuracy. Helps maximize printable area, maintain safe margins, plan color sequences, and scale to larger layouts. |
| Core components | Defined canvas size, consistent margins, and a grid system; color management (RGB/CMYK); RIP or printer settings to reproduce artwork; alignment and waste control. |
| Tools, software, and materials | Printer and heat press; transfer film and adhesive powder; design software (Illustrator/Photoshop or equivalents) or grid-based layout tool; reusable templates; ICC profiles; RIP with CMYK; export formats (PDF/TIFF/PNG at 300–600 dpi); test garments. |
| Getting ready: preparing designs | Gather artwork, separate layers, check transparency, ensure print-readiness for fabric. Convert text to outlines and match printer capabilities. Plan varying sizes to maximize sheet real estate and avoid overcrowding. |
| Step 1: Define target size and layout | Choose a sheet size that matches printer output and transfer film width (e.g., Letter or A4). Create a grid, decide single-row, tiled, or mixed layouts, and start with a simple 2×2 or 3×3 grid. |
| Step 2: Create a master template with margins and bleed | Establish consistent margins; include 2–3 mm bleed. Save the master template as a reusable file for quick design drops later. |
| Step 3: Import and arrange designs in the grid | Place each artwork into its cell; use alignment tools to center and space evenly; maintain baseline heights; scale designs proportionally to keep a balanced composition. |
| Step 4: Manage color and print-ready settings | Color manage to printer space (often CMYK); export at 300–600 dpi; if using a RIP, apply proper color profiles and test prints; monitor white areas and transparency for layering. |
| Step 5: Add final marks and export | Add registration marks/trim lines if helpful; export print-ready files (PDF common; TIFF/PNG also acceptable); ensure dimensions match target sheet and stay within safe zones. |
| Step 6: Test print and calibrate on fabric | Print a test sheet on release paper or scrap garment; verify alignment, color, and density; cure/heat set per process; adjust scale/margins/colors as needed and re-export. |
| Step 7: Full production and post-processing | Proceed with production, group multiple orders on gang sheets, apply transfer film and adhesive, perform heat press steps, then peel and cure. Maintain a log of settings for future reference. |
| Best practices and common pitfalls | Plan layouts first, maintain consistent margins, use test prints, understand equipment, preserve design integrity, and align workflow with the order process to improve speed and consistency. |
| Advanced tips | Build library templates for different sheet sizes; standardize color palettes; consider batch processing automation; run calibration routines; document checklists to speed onboarding and ensure quality. |
| Troubleshooting common issues | Color shifts: revisit color profiles; misalignment: recheck grid/press calibration; missing bleed: ensure bleed area; ghosting: ensure proper curing and dry transfer handling. |
| Summary | A DTF Gangsheet Builder-based workflow aggregates multiple designs onto a single transfer sheet, boosting efficiency, consistency, and scalability in Direct-to-Fabric printing by guiding beginners from layout to production with a repeatable process. |
Summary
Table and Key Points: The HTML table above captures the core ideas from the provided DTF Gangsheet Builder introduction, including what it is, why beginners should use it, its core components, required tools, design preparation, a seven-step workflow, best practices, advanced tips, troubleshooting, and a concise summary.