California DTF: A Beginner’s Guide to Direct-to-Film Printing
California DTF opens a practical doorway for small shops eager to diversify their offerings with bold, vibrant designs without the heavy upfront investment. This beginner-friendly guide dives into Direct-to-Film printing, outlining how to choose a printer, films, and powders while keeping production smooth and affordable. You’ll see why these transfers work well on a wide range of fabrics, including polyester blends and dark textiles, and how the technology can deliver vibrant, durable results. Understanding the basics—from artwork setup to transfer techniques—helps you move from curiosity to confident, on-demand production for clients in California and beyond. With practical tips and real-world expectations, this introduction sets the stage for a scalable workflow that fits small shops and hobbyists alike.
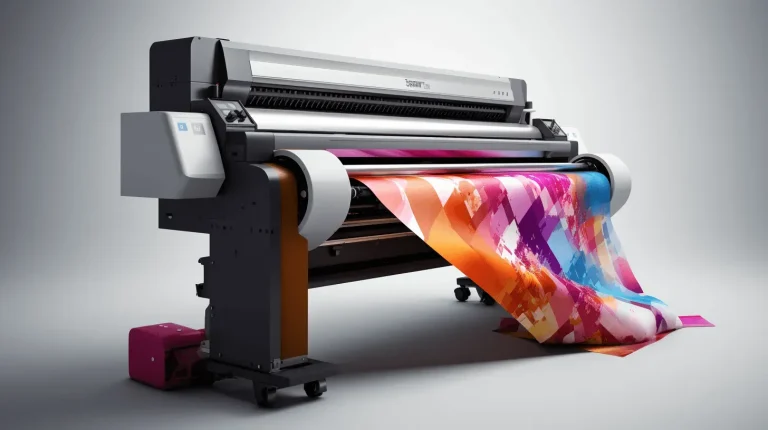
Think of this approach as a film-based transfer system that moves a printed image from a PET sheet to fabric using heat and pressure. Compared with traditional screen printing or direct-to-garment methods, this technique relies on a printed film, a curing powder, and a standardized pressing process to create bold, durable graphics. In California studios and workshops, designers often reference transfer technology, heat-apply graphics, and polymer-resin adhesives as part of an evolving on-demand production toolkit. Whether you call it a film-to-fabric method or a heat-applied graphic process, the core idea remains the same: fast setup, flexible color options, and efficient small-batch output.
What Is Direct-to-Film Printing and Why California DTF Matters
Direct-to-Film printing is a workflow that begins with printing designs onto a PET film using DTF-compatible inks, followed by applying an adhesive powder over the wet ink, curing the powder to activate bonding, and then transferring the image to fabric with heat and pressure. The result is a vivid transfer that can be produced on demand across a wide range of fabrics, including blends and dark textiles.
In California, this approach has gained traction for its beginner-friendly setup and scalable production potential. California DTF appeals to hobbyists and small shops seeking bright, durable designs without the heavier upfront investments of some traditional printing methods, while still enabling fast turnaround for local brands and teams.
DTF Transfers: From Film to Fabric
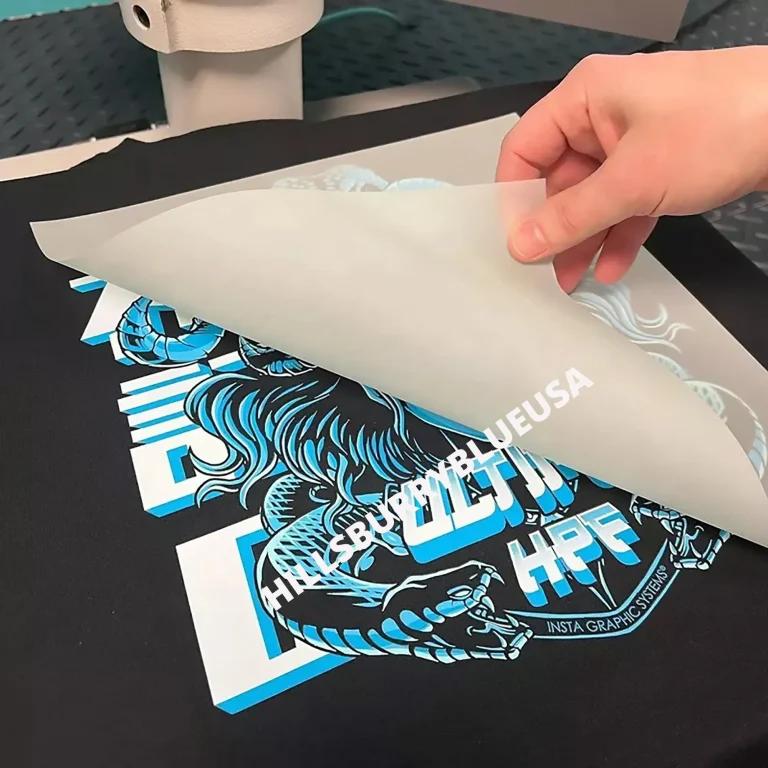
DTF Transfers involve printing onto a PET film, applying an adhesive resin-like powder, curing the powder to activate bonding, and then transferring the image to the garment using heat and pressure. This sequence creates a strong, durable bond between the ink and fabric, with clear color, sharp details, and good opacity on dark fabrics.
The resulting transfer is typically washable and long-lasting when the process is executed with proper curing and pressing parameters. For beginners, establishing a reliable workflow around powder handling, film quality, and heat-press settings is essential to achieving consistent results and reducing post-transfer issues.
Direct-to-Film vs DTG: Choosing the Right Fit for Small Shops
Direct-to-Film vs DTG highlights two distinct approaches: DTF prints are formed on film and then transferred to fabric using adhesive powder, while DTG applies water-based inks directly onto the garment. Each method has its own strengths, with DTF offering strong color, broad fabric compatibility, and cost-effective runs, and DTG delivering a particularly soft hand-feel on 100% cotton items.
For small shops and on-demand workflows, DTF often provides a practical balance of speed, versatility, and lower setup complexity, especially for blends and dark textiles. DTG can be ideal when the goal is ultra-soft fabric feel and high-resolution detail on light-colored garments, but it may require pretreatment and more maintenance.
DTF Printer Setup: Building a Reliable Startup Workflow
DTF Printer Setup begins with selecting a compatible printer and inks, loading PET films designed for DTF transfers, and configuring color profiles that align with your designs. White ink underbase capabilities are particularly important for achieving opacity on darker fabrics, so planning your color strategy from the start is essential.
A practical setup also includes regular maintenance routines, such as print-head cleaning, nozzle checks, and careful powder handling. Establishing a clean, organized workspace and a repeatable prepress and pressing protocol helps maintain consistency and reduces common issues like misprints or powder adhesion problems.
DTF Printing California: Local Resources, Suppliers, and Demos
DTF Printing California emphasizes leveraging regional resources, including local suppliers, hands-on demonstrations, and state-focused training. Access to California-based distributors and in-person workshops can shorten the learning curve and let you compare brands of printers, films, and powders with real equipment.
Networking with nearby DTF printers and attending county or city events can yield practical insights tailored to California’s market styles and climates. Building local relationships also helps with sourcing materials, sharing tips on curing times, and refining workflows that meet regional demand for durable, on-demand transfers.
Troubleshooting and Quality Control in DTF Transfers
Common challenges in Direct-to-Film printing include color misalignment or banding, uneven powder coverage, ghosting, and transfers peeling after washing. These issues often point to calibration gaps, film quality, or inconsistent curing and pressing conditions.
A robust quality-control routine helps prevent problems: verify color profiles, test white underbase opacity on dark fabrics, check powder coating consistency, and confirm correct press temperature and dwell time. Regular test runs on multiple fabrics, combined with a standardized prepress checklist, can significantly improve yield and reduce post-press reworks.
Frequently Asked Questions
What is California DTF and how does Direct-to-Film printing work for beginners?
California DTF refers to Direct-to-Film printing workflows used in the state and beyond. In Direct-to-Film printing, you print designs onto a PET film with a DTF printer, apply an adhesive powder, cure it, and then transfer the image to fabric with heat and pressure. This yields durable, vibrant DTF transfers on a wide range of fabrics, including blends and dark textiles, making it a beginner-friendly option for small shops and hobbyists in California.
Direct-to-Film printing vs DTG: which is better for California DTF transfers and small shops?
In many California settings, Direct-to-Film printing offers a simpler setup for short runs, no pretreatment on many fabrics, and strong opacity on dark colors, making DTF transfers attractive for small shops. DTG (direct-to-garment) can provide a softer hand on 100% cotton and may require pretreatment and more maintenance. The choice depends on fabric, run size, and desired hand-feel.
What does a typical DTF printer setup look like for California DTF printing?
Core equipment for DTF printer setup includes a dedicated DTF printer with compatible inks (including white underbase), DTF PET film sheets, adhesive resin powder, and a heat source for curing plus a heat press for transfers. You’ll also need lint rollers, cleaning supplies, and a way to calibrate color profiles to ensure consistent DTF transfers. Regular maintenance and proper curing of the powder are essential for reliable California DTF printing.
What are best practices for achieving vibrant DTF printing in California on dark fabrics?
Plan designs with a white underbase for dark fabrics and print at high resolution on the film to preserve detail. Calibrate color profiles and optimize print settings for speed versus quality, then cure the adhesive powder fully before pressing. When transferring, use proper temperature (around 150–170°C / 300–340°F) and time (15–25 seconds), and ensure fabrics are prepped and pressed flat. These practices help deliver bright, durable Direct-to-Film printing results in California.
What common challenges do California DTF printers face with DTF transfers, and how can I troubleshoot?
Common issues include color misalignment or banding, powder not adhering, ghosting, peeling after wash, and fabric texture affecting print quality. Troubleshoot by calibrating color profiles, testing powder coating and curing times, ensuring even powder coverage, verifying transfer temperature and time, and adjusting for fabric type. Regular cleaning and using quality films help maintain consistent DTF transfers.
How should a California-based business budget for DTF printer setup and ongoing DTF printing costs?
Budget upfront for a DTF printer setup, including the printer, white and color inks, PET films, adhesive powder, and a reliable heat press. Ongoing costs include films, powders, ink replacements, and maintenance. Given California’s strong demand for custom apparel, a well-planned DTF printing operation can achieve a favorable ROI with on-demand, small-batch production.
| Key Aspect | Summary / Key Points | Notes |
|---|---|---|
| What is California DTF? | Direct-to-Film printing uses a PET film, adhesive powder, and heat to transfer designs onto fabrics. In California, the technique is used by hobbyists, small shops, and brands for durable, vibrant transfers across a range of fabrics. | Defines the scope: California DTF refers to DTF printing workflows as used within California and beyond. |
| Direct-to-Film basics | Print onto a film, apply a resin-like adhesive powder, cure, then transfer the image to fabric. This yields bright colors and fine details with a potentially simpler workflow for small runs. | DTF differs from screen printing and DTG by printing on film first, then transferring to fabric. |
| Equipment & materials | DTF printer with compatible inks, PET film sheets, white and color inks, adhesive powder, curing source, heat press, and basic prep tools (weeding tools, lint rollers). | Essential setup for starting a DTF project in California. |
| DTF workflow (design to garment) | 1) Design artwork 2) Print on film 3) Apply adhesive powder and cure 4) Transfer to fabric with heat/pressure 5) Post-processing and care | Steps outline the end-to-end process from concept to finished garment. |
| Best practices & setup | Calibrate color profiles, optimize print settings, maintain printer and tools, prep fabrics properly, handle powder carefully, and ensure complete curing before transfer. | Guidelines to improve consistency and reduce errors. |
| Advantages & considerations | High fabric compatibility, strong color brightness, easy on small runs, potentially lower setup costs. Consider DTG or screen printing for some large-volume projects. | DTF is flexible but may not always be the best choice for high-volume or ultra-soft hand-feel needs. |
| Common challenges | Color misalignment, powder adhesion issues, ghosting, peeling after wash, and fabric texture effects. Regular calibration and proper curing help mitigate these. | Troubleshooting tips. |
| Getting started in California | Attend local demos/workshops, source reputable DTF films/powders from established brands, and run small test batches to validate workflows on CA-supplied fabrics. | CA-specific supplier networks and hands-on learning opportunities. |
Summary
HTML table provided above summarizes key points about California DTF and the Direct-to-Film printing process for beginners and small shops.